How to Create a Facebook Account and a Page
In this comprehensive guide, we will walk you through the process of creating a Facebook account and page. Whether you're an individual looking to connect with friends and family or a business aiming to establish a strong online presence, Facebook offers a user-friendly platform to achieve your goals. By following the step-by-step instructions outlined below, you'll be able to create an account and a page on Facebook with ease.
Section 1: Creating a Facebook Account
Step 1: Visit the Facebook Website
To begin the account creation process, open your web browser and visit the official Facebook website at www.facebook.com.
Step 2: Sign Up
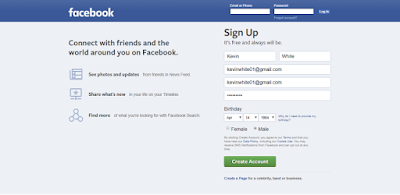
On the Facebook homepage, you will find a sign-up form. Fill in your personal information, including your name, email address or phone number, password, date of birth, and gender. Make sure to use a valid email address or phone number as it will be used for account verification and future logins.
Step 3: Complete Account Verification
After entering your information, Facebook will prompt you to verify your account. Follow the instructions provided, which may include verifying your email address or phone number through a confirmation code.
Step 4: Customize Your Profile
Once your account is verified, you can customize your profile. Upload a profile picture and add relevant details about yourself, such as your education, work experience, interests, and hobbies. This will help others find and connect with you on Facebook.
Section 2: Creating a Facebook Page
Step 1: Access the Pages Creation Section
To create a Facebook page, log in to your Facebook account and click on the "Create" button located at the top right corner of the homepage. From the drop-down menu, select "Page."
Step 2: Choose a Page Category
Facebook offers various page categories to suit different types of businesses and organizations. Select the category that best represents the nature of your page. For example, if you're creating a page for a local business, choose the "Local Business or Place" category.
Step 3: Provide Page Details
After selecting a category, you will be prompted to provide specific details about your page. Fill in the required fields, such as the page name, address, phone number, and website (if applicable). Make sure to provide accurate and up-to-date information to establish credibility with your audience.
Step 4: Customize Your Page
Once your page is created, you can customize its appearance to align with your branding. Upload a profile picture and cover photo that reflect your business or organization. Additionally, write a compelling and informative "About" section to introduce your page to visitors.
Conclusion
Congratulations! You have successfully created a Facebook account and page. By following the steps outlined in this comprehensive guide, you can leverage the power of Facebook to connect with friends, family, or a wider audience for your business. Remember to regularly update your page with engaging content and interact with your audience to foster meaningful relationships.
.png)
.png)
.png)
.png)
Comments
Post a Comment